0%

Expression Language

  • 표현 언어가 제공하는 기능

    • JSP의 scope에 맞는 속성 사용
    • 집합 객체에 대한 접근 방법 제공
    • 수치 연산, 관계 연산, 논리 연산자 제공
    • Java class method 호출 기능 제공
    • 표현 언어만의 기본 객체 제공
    • Java 코드보다 조금 깔끔하게 JSP 파일을 작성 할 수 있다.
  • 표현언어의 표현 방법

    • ${expr}
    • example
    1
    2
    <jsp:include page="/module/${skin.id}/header.jsp" flush="true"/>
    <b>${sessionScope.member.id}</b>님 환영합니다.

표현 언어의 데이터 타입

  • boolean type: true, false
  • integer type: 0-9
  • floating point type
  • string type: 따옴포 (‘ or “)로 둘러싼 문자열
    • 작은 따옴표를 사용해서 표현할 경우 값에 표현된 작은 따옴표는 '와 같이 \기호와 함께 사용해야 한다.
    • \ 기호 자체는 \ \로 표시한다.
  • null type: null

객체 접근 규칙

1
${<expr1>.<expr2>}
  • expr1이 expr2가 null이면 null을 반환한다.
  • expr1이 Map일 경우 expr2를 key로한 값을 반환한다.
  • expr1이 List나 Array이면, expr2가 정수일 경우 해당 정수번째 index에 해당하는 값을 반환한다.
    • 만약 정수가 아닐 경우 오류가 발생한다.
  • expr1이 객체일 경우는 expr2에 해당하는 getter method에 해당하는 method를 호출한 결과를 반환한다.

수치 연산자

  • +, -, *, / or div
  • 숫자가 아닌 객체와 수치 연산자를 사용할 경우 객체를 숫자 값으로 변환 후 연산자를 수행 : ${“10”+1} → ${10+1}
  • 숫자로 변환할 수 없는 객체와 수치 연산자를 함께 사용하면 에러를 발생 : ${“열”+1} → 에러
  • 수치 연산자에서 사용되는 객체가 null이면 0으로 처리 : ${null + 1} → ${0+1}

비교 연산자

  • == 또는 eq
  • != 또는 ne
  • < 또는 lt
  • > 또는 gt
  • <= 또는 le
  • >= 또는 ge
  • 문자열 비교: ${str == '값'} str.compareTo("값") == 0 과 동일

논리 연산자

  • && 또는 and
  • || 또는 or
  • ! 또는 not

표현 언어 비활성화

1
<%@ page isELIgnored = "true" %>

empty 연산자

1
empty<value>
  • 값이 비어 있거나 zero 값인 경우 true를 리턴 그외의 경우 false를 리턴

비교 선택 연산자

1
2
3
<expr> ? <value1> : <value2>

- `<expr>`의 값이 `true`이면 value1을 리턴하고, `false`이면 value2를 리턴

Scope별 EL의 사용

1
2
3
4
5
6
7
8
9
10
11
12
13
14
15
16
17
18
19
20
21
22
23
24
25
26
27
<%@ page language="java" contentType="text/html; charset=UTF-8"
pageEncoding="UTF-8"%>
<!DOCTYPE html>
<%
pageContext.setAttribute("p1", "page scope value");
request.setAttribute("r1", "request scope value");
session.setAttribute("s1", "session scope value");
application.setAttribute("a1", "application scope value");
%>
<html>
<head>
<meta charset="UTF-8">
<title>Insert title here</title>
</head>
<body>
pageContext.getAttribute("p1") : <%=pageContext.getAttribute("p1") %>
pageContext.getAttribute("p1") : ${pageScope.p1}<br>
request.getAttribute("r1") : ${requestScope.r1}<br>
session.getAttribute("s1") : ${sessionScope.s1}<br>
application.getAttribute("a1") : ${applicationScope.a1}<br>
<br><br>
pageContext.getAttribute("p1"): ${p1}<br>
request.getAttribute("r1"): ${r1}<br>
session.getAttribute("s1"): ${s1}<br>
application.getAttribute("a1"): ${a1}<br>
</body>
</html>

EL 연산

1
2
3
4
5
6
7
8
9
10
11
12
13
14
15
16
17
18
19
20
21
22
23
24
25
26
27
28
29
30
31
32
<%@ page language="java" contentType="text/html; charset=UTF-8"
pageEncoding="UTF-8"%>
<%
request.setAttribute("k", 10);
request.setAttribute("m", true);
%>
<!DOCTYPE html>
<html>
<head>
<meta charset="UTF-8">
<title>Insert title here</title>
</head>
<body>
k: ${k }<br>
k + 5: ${ k + 5 }<br>
k - 5: ${ k - 5 }<br>
k * 5: ${ k * 5 }<br>
k / 5: ${ k div 5 }<br>


k: ${k }<br>
m: ${m }<br>

k > 5: ${ k > 5 }<br>
k < 5: ${ k < 5 }<br>
k <= 10: ${k <= 10 }<br>
k >= 10: ${k >= 10 }<br>
m: ${m }<br>
!m: ${!m }<br>

</body>
</html>

JSP Syntax

  • Declaration – <%! %>: 전역변수 선언 및 메소드 선언에 사용
  • Scriptlet – <% %>: 프로그래밍 코드 기술에 사용
  • Expression – <%=%>: 화면에 출력할 내용 기술에 사용

Declaration (선언문)

  • <%! %>
  • JSP 내에서 변수 및 메소드 선언
1
2
3
4
5
6
<%!
String id = "u001"; // 멤버변수 선언
public String getId() {
return id;
}
%>

Scriptlet

  • <% %>
  • 가장 일반적으로 많이 쓰이는 스크립트 요소
  • 주로 프로그램이의 로직을 기술할 때 사용.
  • 스크립트릿에서 선언된 변수는 지역변수
1
2
3
4
5
6
7
8
9
10
11
12
13
14
15
16
17
18
19
<%@ page language="java" contentType="text/html; charset=UTF-8"
pageEncoding="UTF-8"%>
<!DOCTYPE html>
<html>
<head>
<meta charset="UTF-8">
<title>Insert title here</title>
</head>
<body>
<%
for (int i = 1; i <= 5; i++) {
%>
<h<%=i %>>아름다운 한글 </h<%=i %>>
<%
}
%>

</body>
</html>

Comment

  • JSP에서 사용할 수 있는 주석
    • HTML 주석, JAVA 주석, JSP 주석
  • HTML 주석 browser에서는 안보인다.
  • JSP 주석 <%– –%>
    • JSP 주석은 해당 페이지를, web browser를 통해 출력 결과로서 표시하거나, 웹 브라우저 상에서
      소스 보기를 해도 표시 되지 않음, 또한 JSP주석 내에 실행 코드를 넣어도 그 코드는 실행되지 않는다.
  • JAVA 주석
    • //, /* */ 변환은 되는데 servlet에서 실행될때 안된다.
  • Comment example code
1
2
3
4
5
6
7
8
9
10
11
12
13
14
15
16
17
18
19
20
21
22
23
24
<%@ page language="java" contentType="text/html; charset=UTF-8"
pageEncoding="UTF-8"%>
<!DOCTYPE html PUBLIC "-//W3C//DTD HTML 4.01 Transitional//EN" "http://www.w3.org/TR/html4/loose.dtd">
<html>
<head>
<meta http-equiv="Content-Type" content="text/html; charset=UTF-8">
<title>Insert title here</title>
</head>
<body>
<%--jsp 주석문입니다.
여러줄을 입력할 수 있습니다. --%>
<!-- html 주석문입니다. -->
<%
/*
자바 여러줄 주석문입니다.
*/
for(int i = 1; i <= 5; i++) { // java 한줄 주석문입니다.
%>
<H<%=i %>> 아름다운 한글 </H<%=i %>>
<%
}
%>
</body>
</html>

JSP 내장 객체

  • JSP를 실행하면 서블릿 소스가 생성되고 실행된다.
  • JSP에 입력한 대부분의 코드는 생성되는 Servlet source의 _jspService() method 안에 삽입 되는 코드로 생성된다.
  • _jspService()에 삽입된 코드의 윗부분에 미리 선언된 객체들이 있는데, 해당 객체들은 jsp에서도 사용 가능하다.
  • response, request, application, session, out과 같은 변수를 내장객체라고 한다.
  • 미리 선언이 되어 있으므로 바로 가져다가 쓸 수 있다.
1
2
3
4
5
6
7
8
9
10
11
12
13
14
15
16
<%@ page language="java" contentType="text/html; charset=UTF-8"
pageEncoding="UTF-8"%>
<!DOCTYPE html>
<html>
<head>
<meta charset="UTF-8">
<title>Insert title here</title>
</head>
<body>
<%
StringBuffer url = request.getRequestURL();
out.print("url: " + url.toString());
out.print("<br>");
%>
</body>
</html>

Scope

  • Application: Web Application이 시작되고 종료될 때까지 변수가 유지되는 경우 사용
  • Session: Web Browser 별로 변수가 관리되는 경우 사용
  • Request: http요청을 WAS가 받아서 Web Browser에게 응답할 때까지 변수가 유지되는 경우 사용
  • Page: 페이지 내에서 지역변수처럼 사용, 가장 작은 단위

Page Scope

  • PageContext 추상 클래스를 사용한다
  • JSP 페이지에서 pageContext라는 내장 객체로 사용 가능 하다.
  • forwar가 될 경우 해당 Page scope에 지정된 변수는 사용할 수 없다.
  • 사용방법은 Application scope나 Session scope, request scope와 같다.
  • 지역 변수 처럼 사용된다는 것이 다른 Scope들과 다르다.
  • jsp에서 pageScope에 값을 저장 한 후 해당 값을 EL표기법등에서 사용할 때 사용됩니다.
    지역 변수 처럼 해당 jsp나 서블릿이 실행되는 동안에만 정보를 유지하고자 할 때 사용됩니다.

Request Scope

  • http요청을 WAS가 받아서 Web browser에게 응답할 때까지 변수 값을 유지하고자 할 경우 사용 된다.
  • HttpServletRequest 객체를 사용한다.
  • JSP에서는 request내장 변수를 사용한다.
  • Servlet에서는 HttpServletRequest객체를 사용한다.
  • 값을 저장할 때는 request객체의 setAttribute() 메소드를 사용한다.
  • 값을 읽어들일 때는 request객체의 getAttribute() 메소드를 사용한다.
  • forward시 값을 유지하고자 사용한다.
    • forward 하기 전에 request 객체의 setAttribute() 메소드로 값을 설정한 후, Servlet이나 jsp에게 결과를 전달하여 값을 출력하도록 하였슨데 이렇게 forward 되는 동안 값이 유지되는 것이 Request scope를 이용했다고 한다.

Session Scope

  • Web browser 별로 변수를 관리하고자 할 경우 사용한다.
  • Web browser간의 탭 간에는 세션정보가 공유되기 때문에, 각각의 탭에서는 같은 세션 정보를 사용할 수 있다.
  • HttpSession interface를 구현한 객체를 사용한다.
  • JSP session 내장 변수를 사용한다.
  • Servlet에서는 HttpServletRequest의 getSession() 메소드를 이용하여 seesion 객체를 얻는다.
  • 값을 저장할 때는 session객체의 setAttribute()메소드를 사용한다.
  • 값을 읽어 들일 때는 session 객체의 getAttribute()메소드를 사용한다.
  • 장바구니처럼 사용자 별로 유지가 되어야 할 정보가 있을 때 사용한다.
  • client 마다 유지를 해야하는 정보들을 session scope 에서 저장 및 관리

Application Scope

  • Web Application이 시작되고 종료될 때까지 변수를 사용할 수 있다.
  • ServletContext interface를 구현한 객체를 사용한다.
  • JSP에서는 application 내장 객체를 이용한다.
  • Servlet의 경우는 getServletContext() method를 이용하여 application 객체를 이용한다.
  • Web application 하나당 하나의 application객체가 사용된다.
  • 값을 저장할 때는 application객체의 setAttribute() method를 사용한다.
  • 값을 읽어들일 때는 application객체의 getAttribute() method를 사용한다.
  • 모든 Client가 공통으로 사용해야할 값들이 있을 때 사용한다.

Application Scope examples

  • ApplicationScope01.java
1
2
3
4
5
6
7
8
9
protected void doGet(HttpServletRequest request, HttpServletResponse response) throws ServletException, IOException {
response.setContentType("text/html; charset=UTF-8");
PrintWriter out = response.getWriter();
ServletContext application = getServletContext();
int value = 1;
application.setAttribute("value", value);

out.println("<h1>value:" + value + "</h1>");
}
  • ApplicationScope02.java
1
2
3
4
5
6
7
8
9
10
11
12
13
14
15
protected void doGet(HttpServletRequest request, HttpServletResponse response) throws ServletException, IOException {
response.setContentType("text/html; charset=UTF-8");
PrintWriter out = response.getWriter();

ServletContext application = getServletContext();
try {
int value = (int) application.getAttribute("value");
value++;
application.setAttribute("value", value);

out.println("<h1>value : " + value + "</h1>");
} catch (NullPointerException e ){
out.print("the value was not set.");
}
}
  • ApplicationScope01.jsp
1
2
3
4
5
6
7
8
9
10
11
12
13
14
15
16
17
18
19
20
21
22
23
24
25
<%@ page language="java" contentType="text/html; charset=UTF-8"
pageEncoding="UTF-8"%>
<!DOCTYPE html>
<html>
<head>
<meta charset="UTF-8">
<title>Insert title here</title>
</head>
<body>
<%
try {
int value = (int) application.getAttribute("value");
value = value + 2;
application.setAttribute("value", value);
%>
<h1><%=value %></h1>
<%
} catch (NullPointerException e) {
%>
<h1> 설정된 값이 없습니다. </h1>
<%
}
%>
</body>
</html>

Generics

Generics add stability to your code by making more of your bugs detectable at complie time.

Benefits of using generics

  • Stronger type checks at complie time.

    • A Java complier applies strong type ckecking to generic code and issues errors if the code violates type safety. Fixing complie-time erros is easier than fixing runtime errors, which can be difficult to find.
  • Elimination of casts.

    • The following code snippet without generics requires casting:
    1
    2
    3
    List list = new ArrayList();
    list.add("hello");
    String s = (String) list.get(0);
    • When re-written to use generics, the code does not require casting:
    1
    2
    3
    List<String> list = new ArrayList<String>();
    list.add("hello");
    String s = list.get(0); // no cast
    • Enabling programmers to implement generic algorithms.
      • By using generics, programmers can implement generic algorithms that work on collections of different types, can be customized, and are type safe and easier to read.

Generic Types

  • Definition: A generic type is generic class or interface that is parameterized over types.

Generic Class

  • A generic class is defined with the following format:

    1
    class name<T1, T2, ..., Tn> { /* ... */ }

Type Prameter Naming Conventions

  • E: Element(used extensively by the Java Collections Framework)
  • K: Key
  • N: Number
  • T: Type
  • V: Value
  • S, U, V etc.: 2nd, 3rd, 4th types

Invoking and Instantiating a Generic Type

  • By performing generic type invocation which replaces T with some concrerate value, such as Integer:
1
Box<Integer> intergerBox;
  • To instantiate this class, us the new keyword, as usual, but place Integer between the class name and the parenthesis:
1
Box<Integer> integerBox = new Box<Integer>();
  • Or, In Java SE 7 and later, you can replace the type argument required to
    invoke the constructor of a gneeric class with an empty set of type argument (<>) as long as the complier can determin, or infer, the type argument from the context.

    1
    Box<Integer> integerBox = new Box<>();

Multiple Type Parameters

  • A generic class can have multiple type parameters. For example, the generic OrderedPair class, which implements the generic Pair interface:
1
2
3
4
5
6
7
8
9
10
11
12
13
14
15
16
17
18
public interface Pair<K, V> {
public K getKey();
public V getValue();
}

public class OrderedPair<K, V> implements Pair<K, V> {

private K key;
private V value;

public OrderedPair(K key, V value) {
this.key = key;
this.value = value;
}

public K getKey() { return key; }
public V getValue() { return value; }
}
  • The following statements create two instantiations of the OrderdPair class:
1
2
Pair<String, Integer> p1 = new OrderedPair<String, Integer>("Even", 8);
Pair<String, String> p2 = new OrderedPair<String, String>("hello", "world");

Parameterized Types

  • You can also substitute a type paramter (i.e. K or V) with a parametrized(i.e. List<String>). For example, using the OrderedPair<K, V> example:
1
OrderedPair<String, Box<Integer>> p = new OrderedPair<>("primes", new Box<Integer>(...));

Raw Types

  • A raw type is the name of a generic class or interface without any type arguments. For example, given the generic Box classes:
1
2
3
4
public class Box<T> {
public void set(T t) { /* ... */ }
// ...
}

Generic Methods

Generic methods are methods that introduce their own type parameters.
This is similar to declaring a generic type, but the type parameter’s scope is limited to the method where it is declared. Static and non-static generic methods are allowed, as well as class constructors.

The syntax for a generic method includes a list of type parameters, inside angle brackets, which appears before the method’s return type. For static generic methods, the type parameter section must appear before the method’s return type.

The Util class includes a generic method, compare, which compares two pair objects:

1
2
3
4
5
6
7
8
9
10
11
12
13
14
15
16
17
18
19
20
21
public class Util {
public static <K, V> boolean compare(Pair<K, V> p1, Pair<K, V> p2) {
return p1.getKey().equals(p2.getKey()) && p1.getValue().equals(p2.getValue());
}
}

public class Pair<K, V> {

private K key;
private V value;

public Pair(K key, V value) {
this.key = key;
this.value = value;
}

public void setKey(K key) { this.key = key; }
public void setValue(V value) { this.value = value; }
public K getKey() { return key; }
public V getValue() { return value; }
}

Bounded Type Parameters

There may be times when you want to restrict the types that can be used as type arguments in a parameterized type. For example, a method that operates on numbers might only want to accept instances of Number or its subclasses.
This is what bounded type parameters are for.

To declare a bounded type parmeter, list hte type parameter’s name. followed by the extends keyword, followed by its upper bound, which in this example is Number. Note that, in this context, extends is used in a general sense to mean either “extends” (as in classed) or “implements” (as in interfaces)

Multiple Bounds

The preceding example illustrates the use of a type parameter with a single bound, but a type parameter can have multiple bounds:

1
<T extends B1 & B2 & B3>

If one of the bounds is class, it must be specified first. For example:

1
2
3
4
5
class A { /* ... */}
interface B { /* ... */}
interface C { /* ... */ }

class D <T extends A & B & C> { /* ... */ }

If bound A is not specified first, you get a compile-time error.

Wildcards

In generic code, the question mark (?), called the wildcard, represents an unknown type. The wildcard can be used in a variety of situations: as the type of a parameter, field, or local variable; sometimes as a return type. The wildcard is never used as a type argument for a generic method invocation, a generic class instance creation, or a supertype.

Unbounded Wildcards

The unbounded wildcard type is specified using the wildcards character (?), for example, List<?>, This is called list of unknown type. There are two senarios where an unbounded wildcard is a useful appoach:

  • If you are writing a method that can be implemented using functionality provided in the object class.
  • When the code is using methods in the generic class that don’t depend on the type parameter.

Upperbounded Wildcards

To declare an upper-bounded wildcard, use the wildcard character (?), followed by the extends keyword, followed by its upper bound. Note that, in this context, extends is used in general senese to mean either “extends” (as in classes) or “implements” (as in interfaces).

LowerBounded Wildcards

A lower bounded wildcard is expressed using the wildcard character (?), follwing by the super keyword, followed by its lower bound: <? super A>

Say you want to write a method that puts Integer objects into a list. To maximize flexibility, you would like the method to work on List<Integer>, List<Number>, and List<Object> – anything that can hold Integer values.

Restrictions on Generics

  • Cannot instantiate generic types with primitypes

    1
    2
    Pair<int, char> p = new Pair<>(8, 'a'); // compile-time error
    Pair<Integer, Character> p = new Pair<>(8, 'a');
  • Cannot create instance of type parameters

    1
    2
    3
    4
    public static <E> void append(List<E> list) {
    E elem = new E(); // complie-time error
    list.add(elem);
    }
  • Cannot declare static fields whose types are type parameters

    1
    2
    3
    4
    public class MobileDevice<T> {
    private static T os;
    }
    // ...
  • Cananot use cast or instanceof with parameterized types

1
2
3
4
5
6
7
8
9
10
public static <E> void rtti(List<E> list) {
Object obj = new Object();
if (obj instanceof E) { // not possible

}

if (list instanceof ArrayList<Integer>) { // compile-time error
// ...
}
}
  • Cannot create arrays of parameterized types
1
List<Integer>[] arrayOfLists = new List<Integer>[2]; // compile-time error
  • Cannot create, catch, or throw object of parameterized types
    • A gneneric class connot extend the Throwable class directly or indirectly. For example, the following classes will not complie.
1
2
3
4
5
// Extends Throwable indirectly
class MathException<T> extends Exception { /* ... */ } // compile-time error

// Extends Throwable directly
class QueueFullException<T> extends Throwable { /* ... */ } // compile-time error
  • Cannot overload a method where the format parameter types of each overloads erase to the same raw type.

    • A class cannot have two overloaded methods that will have the same signature after type erasure.
    1
    2
    3
    4
    public class Example {
    public void print(Set<String> strSet) { }
    public void print(Set<Integer> intSet) { }
    }
    • The overloads would all share the same classfile representation and will generate a compile-time error.

요청과 응답

request and response

Was는 웹 브라우저로부터 Servlet요청을 받으면,

  • 요청할 때 가지고 있는 정보를 HttpServletRequest객체를 생성하여 저장합니다.
  • 웹 브라우저에게 응답을 보낼 때 사용하기 위해 HttpServletResponse객체를 생성합니다.
  • 생성된 HttpServletRequest, HttpServletResponse 객체를 서블릿에게 전달 합니다.

HttpServletRequest

  • http 프로토콜의 request 정보를 서블릿에게 전달하기 위한 목적으로 사용
  • 헤더정보, 파라미터, 쿠기, URI, URL등의 정보를 읽어 들이는 메소드를 가지고 있다.
  • Body의 Stream을 읽어 들이는 메소드를 가지고 있다.

HttpServletResponse

  • WAS는 어떤 클라이언트가 요청을 보냈는지 알고 있고, 해당 클라이언트에게 응답을 보내기 위한 HttpServletResponse객체를 생성하여 Servlet에게 전달
  • Servlet은 해당 객체를 이용하여 content type, 응답 코드, 응답 메시지 등을 전송

Header정보 읽어 들이기

  • Web browser가 요청정보에 담아서 보내는 header값을 읽어 들여 브라우저 화면에 출력한다.
1
2
3
4
5
6
7
8
9
10
11
12
13
14
15
16
17
protected void doGet(HttpServletRequest request, HttpServletResponse response) throws ServletException, IOException {
response.setContentType("text/html");
PrintWriter out = response.getWriter();
out.println("<html>");
out.println("<head><title>form</title></head>");
out.println("<body>");

Enumeration<String> headerNames = request.getHeaderNames();
while(headerNames.hasMoreElements()) {
String headerName = headerNames.nextElement();
String headerValue = request.getHeader(headerName);
out.println(headerName + ":" + headerValue + "<br>");
}

out.println("</body>");
out.println("</html>");
}
  • parameter를 읽어서 browser에 출력
1
2
3
4
5
6
7
8
9
10
11
12
13
14
15
16
protected void doGet(HttpServletRequest request, HttpServletResponse response) throws ServletException, IOException {
response.setContentType("text/html");
PrintWriter out = response.getWriter();
out.println("<html>");
out.println("<head><title>from</title></head>");
out.println("<body>");

String name = request.getParameter("name");
String age = request.getParameter("age");

out.println("name:" + name + "<br>");
out.println("age:" + age + "<br>");

out.println("</body>");
out.println("</html>");
}
  • 그 외 오쳥정보 출력(URI, URL, PATH, Remote host 등에 대한 정보 출력)
    • URI: port번호 이하의 내용을 보여 준다.
    • URL: 요청 주소 전체가 보여진다.
    • contentPath: web application 과 mapping 된 path
    • remoteAddr: client의 주소
1
2
3
4
5
6
7
8
9
10
11
12
13
14
15
16
17
18
19
20
protected void doGet(HttpServletRequest request, HttpServletResponse response) throws ServletException, IOException {
response.setContentType("text/html");
PrintWriter out = response.getWriter();
out.println("<html>");
out.println("<head><title>info</title></head>");
out.println("<body>");

String uri = request.getRequestURI();
StringBuffer url = request.getRequestURL();
String contentPath = request.getContextPath();
String remoteAddr = request.getRemoteAddr();

out.println("uri: " + uri + "<br>");
out.println("url: " + url + "<br>");
out.println("contentPath: " + contentPath + "<br>");
out.println("remoteAddr: " + remoteAddr + "<br>");

out.println("</body>");
out.println("</html>");
}

JSP(JavaServer Pages)

  • JSP의 위치는 기본적으로 WebContent 안에 들어간다.
  • JSP는 근본적으로 Servlet으로 변환되어 실행 된다.

JSP 등장 배경

  • MS에서 ASP(Active Server Page) 라는 쉽게 웹을 개발 할 수 있는 스크립트(script) 엔진을 발표함(1998년)
  • 1997년에 발표된 Servlet은 ASP에 비하여 상대적으로 개발 방식이 불편함 -> HTML 코드를 많이 넣어 주어야 했음
  • ASP에 대항하기 위해서 1999sus SUN에서 JSP를 발표
  • JSP는 실제로 Servlet기술을 사용

JSP Example

1
2
3
4
5
6
7
8
9
10
11
12
13
14
15
16
17
18
19
20
<%@ page language="java" contentType="text/html; charset=UTF-8"
pageEncoding="UTF-8"%>
<!DOCTYPE html>
<html>
<head>
<meta charset="UTF-8">
<title>Insert title here</title>
</head>
<body>

<%
int total = 0;
for (int i = 0; i <= 10; i++) {
total = total + i;
}
%>

1부터 10 까지의 합: <%=total %>
</body>
</html>

JSP Life Cycle

  1. Browser가 Web server에 JSP에 대한 요청 정보를 전달 한다.
  2. Browser가 요청한 JSP가 최초로 요청했을 경우만
    1. JSP로 작성된 코드가 Servlet 코드로 변환 된다. (Java file 생성)
    2. Servlet 코드를 컴파일해서 실행가능한 bytecode로 변환한다. (class file 생성)
    3. Servlet class를 로딩하고 인스턴스를 생성한다.
  3. Servlet이 실행되어 요청을 처리하고 응답 정보를 생성한다.
  • JSP life cycle 확인 Example
1
2
3
4
5
6
7
8
9
10
11
12
13
14
15
16
17
18
19
20
21
22
23
24
25
26
27
<%@ page language="java" contentType="text/html; charset=UTF-8"
pageEncoding="UTF-8"%>
<!DOCTYPE html>
<html>
<head>
<meta charset="UTF-8">
<title>Insert title here</title>
</head>
<body>
hello~~
<%
System.out.println("_jspService()");
%>

<%!
// 메소드를 추가할 수 있다
public void jspInit() {
System.out.println("jspInit()!");
}

public void jspDestroy() {
System.out.println("jspDestory()");
}
%>

</body>
</html>

Java Web Application

  • WAS에 deploy 되어 동작하는 어플리케이션.
  • 자바 웹 어플리케이션에는 HTML, CSS, 이미지, 자바로 작성된 클래스(Servlet도 포함됨, package, interface 등), 각종 설정 파일들이 포함 된다.

Servlet

  • Java Web Application의 구성요소 중 동적인 처리를 하는 프로그램의 역할
  • WAS에서 동작하는 JAVA class이다.
  • Servlet은 HttpServlet에서 클래스를 상속 받아야 한다.
  • Servlet과 JSP로부터 최상의 결과를 얻으려면, 웹 페이지를 개발할 때 이 두가지(JSP, Servlet) 을 조화롭게 사용해야 한다. (ex. Web page를 구성하는 화면 HTML은 JSP로 표현하고, 복잡한 프로그래밍은 Servlet으로 구현)

Servlet의 작성 방법

3.x 버전과 그 아래 버전이 다르다는 점 유의

  1. Servlet 3.0 spec이상에서 사용하는 방법
  • web.xml 파일을 사용 X
  • Java annotation을 사용
  1. Servlet 3.0 spec 미만에서 사용하는 방법
  • Servlet을 등록할 때 web.xml파일에 등록

Servlet의 Life Cycle

Servlet Life Cycle

  • WAS는 서블릿 요청을 받으면 해당 서블릿이 메모리에 있는지 확인 합니다.
  • if (메모리에 없음) {
    해당 Servlet class를 memory에 올림
    init() 메소드를 실행
    }
  • service() 메소드를 실행
  • was가 종료되거나, 웹 어플리케이션이 새롭게 갱신될 경우 destroy() 메소드가 실행 된다.
  • HttpServlet의 3가지 method를 override 해서 확인
1
2
3
4
5
6
7
8
9
10
11
12
13
14
15
16
17
18
19
20
21
22
23
24
25
26
27
28
29
package examples;

import java.io.IOException;
import javax.servlet.ServletConfig;
import javax.servlet.ServletException;
import javax.servlet.annotation.WebServlet;
import javax.servlet.http.HttpServlet;
import javax.servlet.http.HttpServletRequest;
import javax.servlet.http.HttpServletResponse;

@WebServlet("/LifecycleServlet")
public class LifecycleServlet extends HttpServlet {
private static final long serialVersionUID = 1L;
public LifecycleServlet() {
System.out.println("LifecycleServlet 생성");
}

public void init(ServletConfig config) throws ServletException {
System.out.println("init 호출!!");
}

public void destroy() {
System.out.println("Destroy 호출!!");
}

protected void service(HttpServletRequest request, HttpServletResponse response) throws ServletException, IOException {
System.out.println("Service 호출!!");
}
}

service(request, response) 메소드

  • HttpServlet의 service method는 template method 패턴으로 구현
  • 클라이언트 요청이 GET일경우 자신이 가지고 있는 doGET(request, response) 메소드를 호출
  • 클라이언트 요청이 Post일경우 자신이 가지고 있는 doPost(request, response)를 호출
  • override 된 method만 정리
1
2
3
4
5
6
7
8
9
10
11
12
13
14
15
16
17
18
19
20
21
22
23
24
@Override
protected void doGet(HttpServletRequest req, HttpServletResponse resp) throws ServletException, IOException {
resp.setContentType("text/html");
PrintWriter out = resp.getWriter();
out.println("<html>");
out.println("<head><title>form</title></head>");
out.println("<body>");
out.println("<form method='post' action='/firstweb/LifecycleServlet'>");
out.println("name : <input type='text' name='name'><br>");
out.println("<input type='submit' value='ok'><br>");
out.println("</form>");
out.println("</body>");
out.println("</html>");
out.close();
}

@Override
protected void doPost(HttpServletRequest req, HttpServletResponse resp) throws ServletException, IOException {
resp.setContentType("text/html");
PrintWriter out = resp.getWriter();
String name = req.getParameter("name");
out.println("<h1> hello " + name + "</h1>");
out.close();
}

HTTP(Hypertext Transfer Protocol)

  • Tim Berners-Lee와 그가 속한 팀은 CERN에서 HTML뿐만 아니라 웹 브라우저 및 웹 브라우저 관련 기술과 HTTP를 발명하였다.
  • 문서화된 최초의 HTTP버전은 HTTP v0.9(1991년)이다.
  • HTTP는 서버와 클라이언트가 인터넷 상에서 데이터를 주고받기 위한 protocol이다.
  • HTTP는 계속 발전하여 HTTP/2까지 버전이 등장했다.

HTTP 작동방식

  • HTTP는 Server/Client model을 따른다.
  • 장점
    • 불특정 다수를 대상으로 하는 서비스에는 적합하다.
    • 클라이언트와 서버가 계속 연결된 형태가 아니기 때문에 클라이언트와 서버 간의 최대 연결 수 보다 훨신 더 많은 요청과 응답을 처리할 수 있다.
  • 단점
    • 연결을 끊어버리기 때문에, 클라이언트의 이전 상황을 알 수 없다.
    • 이러한 특징을 무상태(Stateless)라고 한다.
    • 이러한 특징 때문에 정보를 유지하기 위해서 Cookie와 같은 기술이 등장하게 되었다.

HTTP 요청 Method의 구조

  • 요청 Method: GET, PUT, POST, PUSH, OPTIONS등의 요청 방식이 온다.
    • GET: 정보를 요청하기 위해서 사용 (SELECT)
    • POST: 정보를 밀어 넣기 위해서 사용 (INSERT)
    • PUT: 정보를 업데이트하기 위해서 사용 (UPDATE)
    • DELETE: 정보를 삭제하기 위해서 사용 (DELETE)
    • HEAD: (HTTP)헤더 정보만 요청한다. 해당 자원이 존재하는지 혹은 서버에 문제가 없는지를 확인하기 위해서 사용한다.
    • OPTIONS: 웹서버가 지원하는 메서드의 종류를 요청한다.
    • TRACE: 클라이언트의 요청을 그대로 반환한다. 예컨데 echo 서비스로 서버 상태를 확인하기 위한 목적으로 주로 사용한다.
  • 요청 URI: 요청하는 자원의 위치를 명시한다.
  • HTTP 프로토콜 버전: 웹 브라우저가 사용하는 프로토콜 버전이다.

URL(Uniform Resource Locator)

  • 인터넷 상의 자원의 위치
  • 특정 웹 서버의 특정 파일에 접근 하기위한 경로 혹은 주소

Web Server

  • Web Server는 Web Server Software 가 동작하는 컴퓨터를 말한다.
  • Web Server의 가장 중요한 기능은 Client가 요청하는 HTML문서나 각종 Resource를 전달하는 것이다.
  • Web brower나 web crawler가 요청하는 Resource는 컴퓨터에 저장된 정적 데이터 이거나 동적인 결과가 될 수 있다.

Web Server Software의 종류

  • 가장 많이 사용하는 웹 서버는 Aphache, Nginx, Microsoft IIS
  • Apache 웹 서버는 Apache Software Foundation에서 개발한 웹서버로 오픈소스 소프트웨어(Open-source Software)이며, 거의 대부분 운영체제에서 설치 및 사용을 할 수 있다.
  • Nginx는 차세대 웹서버로 불리며 더 적은 자원으로 더 빠르게 데이터를 서비스하는 것을 목적으로 만들어진 서버이며 Apache웹 서버와 마찬가지로 오픈소스 소프트웨어입니다.

WAS(Web Application Server)

  • WAS는 일종의 MiddleWare로 Web Client(보통 web browser)의 요청 중 보통 web application이 동작하도록 지원하는 목적을 가진다.
  • 초창기 Web Server는 정적인 content를 주로 제공하였으나 동적인 컨텐츠의 수요가 증가 함에 따라서 WAS가 대두 되게 되었다.
  • WAS가 보통 웹 서버 기능을 내장하고 있다.
  • 현재는 WAS가 가지고 있는 웹 서버도 정적인 contents를 처리하는데 있어서 성능상 큰 차이가 없다.
  • 규모가 커질수록 웹 서버와 WAS를 분리한다.
    • 자원 이용의 효율성 및 장애 극복 기능(failover), 유지 보수의 편의성을 위해 분리
  • 보통 Web Server가 WAS 앞단에서 동작하도록 한다.

Client/Server 구조

  • Client는 Service를 제공하는 Server에게 정보를 요청하며 응답 받은 결과를 사용합니다.

DBMS(Database Management System)

  • 다수의 사용자들이 데이터베이스 내의 데이터를 접근할 수 있도록 해주는 소프트웨어

MiddleWare

  • Client쪽에 비즈니스 로직이 많을 경우, Client 관리(배포 등)로 인해 비용이 많이 발생하는 문제가 발생
  • 비즈니스 로직을 Client와 DBMS사이의 middleware server에서 동작하도록 함으로써 client는 입력과 출력을 담당하도록 함
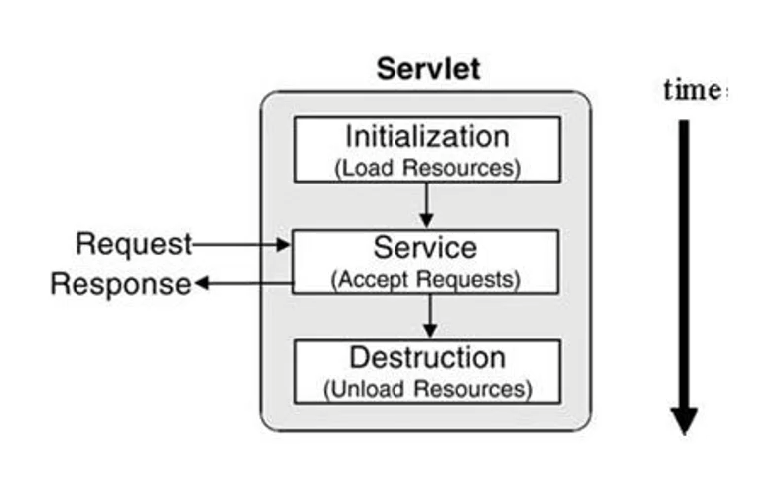
Apache Tomcat

Apache Tomcat is an open-source implementation of the Java servlet, JavaServer Pages, Java Expression Language and WebSocket technologogies.
Tomcat provies a “pure Java” HTTP web server environment in which Java code can run.

  • Apache Tomcat: The most widley used WAS developed from Apache Software Foundation.
  • Web Application can run on top of the WAS that is analogous to relation between application and Operating System.

Quick Sort

  • Pivot을 기준으로 왼쪽에는 작은 숫자 오른 쪽에 큰 숫자가 오도록 하고, Pivot을 기준으로 좌우를 분할하여 subarray에 대해서도 이어서 진행한다.

  • Hoare Parition: 리스트에서 첫 번째 데이터를 피벗으로 정한다.

  • 시간 복잡도: O(NlogN)

  • 가장 왼쪽 데이터를 pivot으로 정할 경우, 이미 데이터가 정렬되어 있는 경우에 O(N^2)의 시간 복잡도가 걸린다.

  • Example:

    1
    2
    3
    4
    5
    6
    7
    8
    9
    10
    11
    12
    13
    14
    15
    16
    17
    18
    19
    20
    21
    22
    23
    24
    25
    26
    # Implementation of quick sort
    def quick_sort(array, start, end):
    if start >= end:
    return

    pivot = start # pick a pivot according to the Hoare Partition
    left = start + 1
    right = end
    while left <= right:
    # Loop until find element which is greater than pivot value.
    while left <= end and array[left] <= array[pivot]:
    left += 1

    # Loop until find element which is less than pivot value.
    while right > start and array[right] >= array[pivot]:
    right -= 1

    # partition completed
    if left > right:
    array[right], array[pivot] = array[pivot], array[right]

    else:
    array[left], array[right] = array[right], array[left]

    quick_sort(array, start, right - 1)
    quick_sort(array, right + 1, end)

Merge Sort

  • 대표적인 Divide-and-Conquer algorithm
  • array를 반으로 나누면서 진행, 더이상 나눠질 수 없을 때까지 나눈 뒤 병합(merge)하는 과정을 거친다.
  • 병합하는 과정에서 두개의 배열 원소들을 비교 하는 과정을 거친다.
  • Example:
1
2
3
4
5
6
7
8
9
10
11
12
13
14
15
16
17
18
19
20
21
22
23
24
25
26
27
28
# Implementation of MergeSort
def merge_sort(arr):
if len(arr) > 1:
mid = len(arr) // 2
left = arr[:mid]
right = arr[mid:]

merge_sort(left)
merge_sort(right)

# Merge
i = j = k = 0
while i < len(left) or j < len(right):
if i < len(left) and j < len(right):
if left[i] < right[j]:
arr[k] = left[i]
i += 1
else:
arr[k] = right[j]
j += 1
else:
if i < len(left):
arr[k] = left[i]
i += 1
if j < len(right):
arr[k] = right[j]
j += 1
k += 1

Count Sort

  • 특정 조건에서 선형 시간에 O(N + K)에서 정렬할 수 있는 알고리즘 이다.

  • 최악의 경우에도 수행시간 O(N + K)를 보장 한다.

  • 일반적으로 가장 큰 데이터와 가장 작은 데이터의 차이가 1,000,000을 넘지 않을 경우 효과적이다.

    • 데이터 크기가 한정되어 있고, 데이터의 크기가 많이 중복되어 있을수록 유리하며 항상 사용 할 수는 없다.
  • Count Sort는 앞에서 소개 했던 비교 기반의 정렬 알고리즘이 아니다.

  • Example

    1
    2
    3
    4
    5
    6
    7
    8
    9
    10
    11
    12
    # Implementation of Count sort
    def count_sort(array):
    count = [0] * (max(array) + 1)

    for e in array:
    count[e] += 1

    j = 0
    for i in range(len(count)):
    for _ in range(count[i]):
    array[j] = i
    j += 1
  • IMPORTANT
  • 내부의 데이터가 정렬되어 있다는 것을 전제 하고 탐색을 O(logN) 시간에 수행 할 수 있는 알고리즘 이다.
  • 탐색하고자 하는 데이터의 시작점, 끝점, 중간점을 가지고 찾으려고 하는 데이터와 중간점의 데이터를 비교 하면서 탐색 범위를 반으로 나누면서 탐색을 수행한다.
  • 탐색 범위가 계속 반으로 줄기 때문에 O(logN) 시간 복잡도가 나올 수 있다.
  • Example:
1
2
3
4
5
6
7
8
9
10
11
12
13
14
15
16
17
18
19
20
21
22
23
24
25
26
def binary_search_recursive(array, target, start, end):
if start > end:
return None

mid = (start + end) // 2
if array[mid] == target:
return mid

elif array[mid] > target:
return binary_search_recursive(array, target, start, mid - 1)

else:
return binary_search_recursive(array, target, mid + 1, end)


def binary_search_iterative(array, target, start, end):
while start <= end:
mid = (start + end) // 2
if array[mid] == target:
return mid
elif array[mid] > target:
end = mid - 1
else:
start = end + 1

return None
  • lower bound

    • 정렬 되어 있을때 해당 값 이상 인 점이 처음 나오는 지점을 찾아 준다.
    • Python에서는 bisect를 import 하여 사용할 수 있다.
    • Example
    1
    2
    3
    4
    5
    6
    7
    8
    9
    def lower_bound(array, target, start, end):
    while start <= end:
    mid = (start + end) // 2
    if array[mid] >= target:
    end = mid - 1
    else:
    start = mid + 1

    return start

The try-with-resource Statement

The try-with-resource statement is try statement that declares one or more resources.
A resource is an object that must be closed after the program is finished with it.
The try-with-resources statement ensures that each resource is closed at the end of the statement.
Any object that implements java.lang.AutoCloseable, which includes all objects which implement java.io.Closeable, can be used as resource.

DFS

Depth-First Search, 깊이 우선 탐색이라고도 부르며, 그래프에서 깊은 부분을 우선적으로 탐색하는 알고리즘이다.

  • Java Example

    • TBD
  • Python Example

    1
    2
    3
    4
    5
    6
    7
    8
    9
    10
    # DFS (recursive) method definition
    def dfs(graph, v, visited):
    # make visited true for the currently visiting node
    visited[v] = True
    print(v, end=" ")

    # visiting neighbor node recursively
    for i in graph[v]:
    if not visited[i]:
    dfs(graph, i, visited)

BFS

Breath-First Search, 너비 우선 탐색, 가까운 노드부터 시작하여 영역을 점점 넓히며 탐색 하는 알고리즘이다.

  • Java Example

    • TBD
  • Python Example

    1
    2
    3
    4
    5
    6
    7
    8
    9
    10
    11
    12
    13
    14
    15
    16
    17
    18
    from collections import deque


    # Implementation of BFS method
    def bfs(graph, start, visited):
    # using queue
    queue = deque([start])
    # Make visited currently visiting node
    visited[start] = True
    # Repeat until queue is empty
    while queue:
    v = queue.popleft()
    print(v, end=" ")
    # adding node to queue which is not visited and neighbor to current node
    for i in graph[v]:
    if not visited[i]:
    queue.append(i)
    visited[i] = True

Sorting

Selection Sort

  • 매번 가장 작은 것을 선택하여 앞의 인덱스로 옮겨 나가는 알고리즘

  • 선택 정렬의 시간 복잡도: O(N^2)

  • Python Example

    1
    2
    3
    4
    5
    6
    7
    8
    9
    array = [7, 5, 9, 0, 3, 1, 6, 2, 4, 8]

    # Implementation Selection Sort
    for i in range(len(array))
    min_index = i
    for j in range(i + 1, len(array)):
    if array[min_index] > array[j]:
    min_index = j
    array[i], array[min_index] = array[min_index], array[i]

Insertion Sort

  • 필요한 경우 데이터의 위치를 바꾸며 정렬

  • 현재 데이터의 상태와 상관없이 무조건 모든 원소를 비교하고 위치를 바꾸는 선택정렬과 비교

    • 데이터가 일부 정렬되어 있는 경우 유리 이런경우 O(N)에 가깝다.
  • Python Example

    1
    2
    3
    4
    5
    6
    7
    8
    # Implementation of insertion sort
    def insertion_sort(array):
    for i in range(1, len(array)):
    for j in range(i, 0, -1):
    if array[j] < array[j - 1]:
    array[j], array[j - 1] = array[j - 1], array[j]
    else:
    break

Java Exception Handling

Exception

Definition: An exception is an event, which occurs during the execution of a program, that distrupt the normal flow of the program’s instructions.
When the an error occurs within a method, the method creates an object and hands it off to the runtime system.
The object, called exception object, contains information about the error, including its type and the state of the program when the error occured.
Creating an exception object and handing it to the runtime system is called throwing an exception.

Advantages of Exceptions

1. Seperating Error-Handling Code from “Regular” Code

Exceptions enable you to write the main flow of your code and to deal with the exceptional cases elsewhere.
If the readFile function used exceptions instead of traditional error-management techniques, it would look more like the following:

1
2
3
4
5
6
7
8
9
10
11
12
13
14
15
16
17
18
19
readFile {
try {
open the file;
determine its size;
allocate that much memory;
read the file into memory;
close the file;
} catch (fileOpenFailed) {
doSomething;
} catch (sizeDeterminationFailed) {
doSomething;
} catch (memoryAllocationFailed) {
doSomething;
} catch (readFailed) {
doSomething;
} catch (fileCloseFailed) {
doSomething;
}
}

2. Propagating Errors Up the Call Stack

A second advantage of exceptions is the ablity to propagate error reporting up the call stack of methods.

A method can duck any exceptions thrown within it, thereby allowing a method farther up the call stack to catch it.
Hence, only the methods that care about errors have to worry about decting errors

1
2
3
4
5
6
7
8
9
10
11
12
13
14
15
method1 {
try {
call method2;
} catch (exception e) {
doErrorProcessing;
}
}

method2 throws exception {
call method3;
}

method3 throws exception {
call readFile;
}

3. Grouping and Differentiating Error Types

Because of all exceptions thrown within a program are objects, the grouping or categorizing exceptions is a natural outcome of the class hierarchy.

The try Block

The first step in constructing an exception handler is to enclose the code that might throw an exception within try block.
In general, a try block looks like the following:

1
2
3
4
try {
code
}
catch and finally blocks...

The segment in the example labeled code contains one or more legal lines of code that throw an exception.

The catch Blocks

You associate exception handlers with a try block by providing one or more catch blocks directly after the try block.

1
2
3
4
5
6
7
try {

} catch (ExceptionType name) {

} catch (ExceptionType name) {

}

Each catch block is an exception handler that handles the the type of exception indicated by its argument.
The arguments type, ExceptionType, declares the type of exception that the handler can handle and must be the
name of a class that inherits form the Throwable class. The handler can refer to the exception with name.

Exception handlers can do more than just print error messages or halt the program.
They can do error recovery, prompt the user to make a decision, or propagate the error up to a higher-level handler using chanined exceptions.

The finally Block

The finally block always executes when the try block exits.
This ensures that the finally block is executed even if an unexpected exception occurs.
But finally is useful for more than just exception handling – it allows the programmer to avoid having cleanup code accidentally bypassed
by a return, continue, or break. Putting cleanup code in finally block is always a good practice, even when no exceptions are anticipated.

Important: The finally block is a key tool for preventing resource leaks.
When closing a file or otherwise recovering resources, place the code in a finally block to ensure that resource is always recovered.

Consider using the try-with-resources statement in these situations, which automatically release system resource when no longer needed.

JDBC(Java Database Connectivity)

  • JDBC(Java Database Connectivity)의 정의

    • JAVA를 이용한 Database접속과 SQL문장의 실행, 그리고 실행 결과로 얻어진 데이터의 핸들링을
      제공하는 방법과 절차에 관한 규약

    • JAVA program 내에서 SQL문을 실행하기 위한 JAVA API

    • SQL과 programming 언어의 통합 접근 중 한 형태

  • JAVA는 표준 interface인 JDBC API를 제공

  • Database는 vendor, 또는 기타 3rd-party에서는 JDBC interface를 구현한
    driver를 제공한다.

JDBC Environmental Setup

  • Install JDK

  • Install JDBC Driver

    • Maven에 아래와 같이 의존성 추가. MySQL사이트에서 다운로드 가능.

      1
      2
      3
      4
      5
      <dependency>
      <groupId>mysql</groupId>
      <artifactId>mysql-connector-java</artifactId>
      <version>5.1.45</version>
      </dependency>

JDBC를 이용한 프로그래밍 방법

  1. import java.sql.*
  2. JDBC 드라이버를 로드한다.
  3. Connection 객체를 생성한다.
  4. Statement 객체를 생성 및 질의 수행
  5. SQL문에 결과물이 있다면 ResultSet 객체를 생성한다.
  6. 모든 객체를 닫는다.

JDBC 클래스의 생성 관계

DriverManager -> Connection -> Statement -> ResultSet

  • DriverManager를 이용해서 Connection인스턴스를 얻는다.
  • Connection을 통해서 Statement를 얻는다.
  • Statement를 이용해 ResultSet을 얻는다.

JDBC 단계별 사용

  1. Import
1
import java.sql.*;
  1. Driver 로드
1
Class.forName("com.mysql.jdbc.Driver");
  1. Connection 얻기
1
2
3
String dburl = "jdbc:mysql://localhost/dbname";

Connection con = DriverManager.getConnection(dburl, ID, PWD);
  • 1, 2, 3까지의 코드 예제

    1
    2
    3
    4
    5
    6
    7
    8
    9
    public static Connection getConnection() throws Exception{
    String url = "jdbc:oracle:thin:@117.16.46.111:1521:xe";
    String user = "smu";
    String password = "smu";
    Connection conn = null;
    Class.forName("oracle.jdbc.driver.OracleDriver");
    conn = DriverManager.getConnection(url, user, password);
    return conn;
    }
  1. Statement 생성
1
2
3
4
5
Statement stmt = con.createStatement();

stmt.execute(“query”); //any SQL
stmt.executeQuery(“query”); //SELECT
stmt.executeUpdate(“query”); //INSERT, UPDATE, DELETE
  1. ResultSet으로 결과 받기
1
2
3
ResultSet rs = stmt.executeQuery("select no from user");
while (rs.next())
System.out.println(rs.getInt("no"));
  1. Close
1
2
3
4
5
rs.Close();

stmt.close();

con.close();
  • example 1

    1
    2
    3
    4
    5
    6
    7
    8
    9
    10
    11
    12
    13
    14
    15
    16
    17
    18
    19
    20
    21
    22
    23
    24
    25
    26
    27
    28
    public List<GuestBookVO> getGuestBookList(){
    List<GuestBookVO> list = new ArrayList<>();
    GuestBookVO vo = null;
    Connection conn = null;
    PreparedStatement ps = null;
    ResultSet rs = null;

    try{
    conn = DBUtil.getConnection();
    String sql = "select * from guestbook";
    ps = conn.prepareStatement(sql);
    rs = ps.executeQuery();
    while(rs.next()){
    vo = new GuestBookVO();
    vo.setNo(rs.getInt(1));
    vo.setId(rs.getString(2));
    vo.setTitle(rs.getString(3));
    vo.setConetnt(rs.getString(4));
    vo.setRegDate(rs.getString(5));
    list.add(vo);
    }
    }catch(Exception e){
    e.printStackTrace();
    }finally {
    DBUtil.close(conn, ps, rs);
    }
    return list;
    }
  • example 2

    1
    2
    3
    4
    5
    6
    7
    8
    9
    10
    11
    12
    13
    14
    15
    16
    17
    18
    19
    20
    21
    22
    public int addGuestBook(GuestBookVO vo){
    int result = 0;
    Connection conn = null;
    PreparedStatement ps = null;

    try{
    conn = DBUtil.getConnection();
    String sql = "insert into guestbook values("
    + "guestbook_seq.nextval,?,?,?,sysdate)";
    ps = conn.prepareStatement(sql);
    ps.setString(1, vo.getId());
    ps.setString(2, vo.getTitle());
    ps.setString(3, vo.getConetnt());
    result = ps.executeUpdate();
    }catch(Exception e){
    e.printStackTrace();
    }finally {
    DBUtil.close(conn, ps);
    }

    return result;
    }
  • example 3

    1
    2
    3
    4
    5
    6
    7
    8
    9
    10
    11
    12
    public static void close(Connection conn, PreparedStatement ps){
    if (ps != null) {
    try {
    ps.close();
    } catch (SQLException e) {e.printStackTrace(); }
    }
    if (conn != null) {
    try {
    conn.close();
    } catch (SQLException e) {e.printStackTrace();}
    }
    }

Wrapper Class

  • 기본형 타입을 객체로 쓰기 위해 있는 클래스
  • 기본형 타입이 허용되지 않는 문법에 기본형 타입을 쓰기 위해서 사용
Type Wrapper Class
byte Byte
char Character
short Short
int Integer
long Long
float Float
double Double
boolean Boolean
  • Examples
1
2
3
4
5
public static Integer add(Integer x, Integer y) {
return x + y; // Unboxing
// 자동으로 기본자료형으로 변형되어서 계산
// 반환시 다시 Autoboxing 이루어짐
}
1
2
3
4
5
6
7
8
9
10
11
12
13
14
15
16
17
18
19
20
21
22
23
24
25
public class WrapperClass {
public static <T> T bypass(T x) {
return x;
}

public static void main(String[] args) {
Integer integer = new Integer(10); // Deprecated.., not recomended
Integer integer1 = Integer.valueOf(10);

Character character = new Character('d');
Character character1 = Character.valueOf('f');

// Autoboxing
Integer integer2 = 4;
System.out.println(add(4, 2));

bypass(5); // autoboxing
// T: Wrapper class인 Integer로 결정됨
// 5 -> new Integer(5), Autoboxing

// 문자열 <-> 기본 자료형
int x = Integer.parseInt("100"); // recommended, parse+자료형, 정적 메소드, 리턴 타입이 int임
int z = Integer.valueOf("200"); // return type Integer unboxing
}
}

Errors / Exceptions

오류 (Errors)

  • 메모리 부족 또는 프로그램 실행이 꼬이는 경우.
  • 더이상 어떻게 프로그램을 복구해야 할지 알 수 없다.
  • 프로그램의 문제를 해겷하여 해결

예외 (Exceptions)

  • 오류(Error)에 비해서 심각도가 낮고, 프로그램의 정상적인 흐름만 방해
    • 파일을 읽으려 했으나 해당 파일이 없는경우
    • 네트워크 연결 유실
  • 문제 상황을 처리하는 로직을 구현하여, 런타임에서 자연스럽게 해결 가능

예외 처리 (Excpetion handling)

  • 예외가 발생 했을 경우, 이 상황을 ‘감지’하고 ‘처리’하는 코드
  • try ~ catch, throws, throw, finally 키워드들을 이용
  • Throwable 클래스를 상속하는 자식클래스들로 이러한 문제를 해결

Throwable Class

  • Throwable 클래스는 ExceptionError 클래스에 의해 상속

    • Exception

      • Checked Exceptions: 예외 처리되지 않으면 컴파일이 되지 않은 예외 (file I/O)

        • Exception Class를 상속하고 있으면 Checked Exception
        • try ~ catch를 통해 예외를 꼭 처리해 주어야 컴파일이 된다.
      • Unchecked Exceptions: 예외 처리되지 않아도 컴파일이 되는 예외

        • RuntimeException 클래스를 상속하고 있으면 Unchecked Exception
        • try ~ catch를 작성하지 않더라도 빌드/실행 가능
        • ArrayIndexOutOfBoundsExceptions
        • ArithmeticException
    • Error: 프로그램이 복구 불가능한 상황

메소드 설명
public String getMessage() 발생한 예외에 대한 메세지를 반환
public String getLocalizedMessage() 오버라이드하여 추가 메세지 제공 (오버라이드하지 않으면 getMessage()와 동일)
public Throwable getCause() 예외의 원인이 되는 Throwable 객체 반환
public void printStackTrace() 예외가 발생된 메소드가 호출될 때의 Method call stack을 출력

try ~ catch statement

1
2
3
4
5
6
7
try {
// 예외가 발생할 수 있는 코드
// 예외가 발생할 경우 예외 객체를 던짐 (throw)
} catch (Exception e) { // 던져진 예외를 받음 (catch)
// Exception class 및 그 자식 클래스를 사용
// 예외 상황을 처리해야 하는 코드
}
  • example
1
2
3
4
5
6
7
try {
int[] integers = new int[10];
integers[20] = 5;
} catch (ArrayIndexOutOfBoundsException e) {
System.out.println(e.getMessage());
e.printStackTrace();
}

Multiple Exception Handling

  • 여러 개의 catch 구문을 사용하면 다중 예외를 처리할 수 있음
  • 순차적으로 검사하면서 적용가능한 예외를 처리
1
2
3
4
5
6
7
8
9
10
11
12
13
14
15
16
17
18
try {
// 아주 예민한 내용이 실행되는 부분
// 특정 catch 구문에 선택되는 조건문
// 다형성에 의해서 결정 된다.
// 즉, catch 하고 있는 클래스의 자식 클래스의 객체면 catch 가능
// catch 하는 순서가 중요 -> 위에서 부터 자식 객체인 것이 좋다.
} catch (ArithmeticException e) {

} catch (FileAlreadyExistsException e) {

} catch (EOFException e) {

} catch (IOException e) {

} catch (Exception e) { // 나머지 모든 Exception 모두 catch
// 모든 Exception 객체의 조상
// 권장하지 않음, 무책임한 catch 이다.
}

try ~ catch ~ finally

  • try 구문 실행 중에 어떤 일이 발생해도 반드시 실행되어야 하는 구문은 finally block에 작성
  • try 구문 내에 return 문이 있는 경우에도 finally 블록은 실행됨
  • try 구문 내에서 접근한 System 자원을 안전하게 복구하기 위해 사용
1
2
3
4
5
6
7
8
9
10
11
12
13
14
15
try {
file = new FileInputStream("a.txt");
file.read();
} catch (IOException e) {
System.out.println("파일 처리 실패");
} finally {
System.out.println("파이널리");
if (file != null) { // file 읽기에 실패한 경우 파일을 닫아준다.
try {
file.close();
} catch (IOException e) {
System.out.println("앗!... 아아...");
}
}
}

try ~ with ~ resource statement

  • Java1.7에서 추가된 기능
  • AutoClosable interface를 구현하는 리소스에만 사용가능
1
2
3
4
5
try (FileInputStream file1 = new FileInputStream("a.txt")) {
file1.read();
} catch (IOException e) {
System.out.println("파일 처리 실패");
}

Specifying the Exceptions Thrown by a Method

  • Checked Exception의 경우
1
2
3
4
5
6
7
8
9
10
11
12
13
14
15
class CheckedExceptionThrow {
void methodA() throws IOEception {
FileInputStream file1 = new FileInputStream("a.txt");
file1.read();
file1.close();
}

void methodB() /*throws*/ {
try {
methodA();
} catch (IOException e) {
System.out.println("메소드에실패")
}
}
}
  • Unchecked Exception: throws 키워드 사용하지 않아도 가능
1
2
3
4
5
6
7
8
9
10
11
12
13
14
15
16
17
class UncheckedExceptionThrows {
void methodA() {
int x = 10 / 0;
}

void methodB() {
methodA();
}

public static void main(String[] args) {
try {
new UncheckedExceptionThrow().methodB();
} catch (ArithmeticException e) {
e.getMessage();
}
}
}
  • method를 override할경우 부모 class 의 method exception 보다 저 조상인 exception은 던질 수 없다.
1
2
3
4
5
6
7
8
9
10
11
class Foo {
void methodA() throws IOException {} // Checked Exception
}

class BarOne extends Foo {
void methodA() throws IOException {} // possible
}

class BarTwo extends Foo {
void methodA() throws FileNotFoundEception {} // 자식 Exception은 pass 가능
}

throw

  • 예외를 발생 시키는 키워드
  • new 키워드로 새 Exception 객체를 생성하여 예외 내용을 작성
1
2
3
4
5
6
7
void exceptMethod() throws Exception {
...
if (Err) {
throw new Exception("Some Error"); // 예외 발생 및 Message 전달
}
...
}

Custom Exceptions

  • Exception 또는 RuntimeException Class를 상속하여 작성

    • Exception을 상속한경우 Checked Exception이 되어 반드시 예외를 처리해야 한다.
    1
    2
    3
    4
    5
    6
    7
    8
    9
    10
    11
    12
    13
    14
    15
    16
    17
    18
    19
    class MyException extends RuntimeException {
    enum ErrorCode {
    ERROR_A, ERROR_B;
    }

    private ErrorCode errorCode;

    public MyException(ErrorCode errorCode, String message) {
    super(message)
    this.erroCode = errorCode;
    }

    @override
    public String getLocalizedMessage() {
    String message = getMessage();
    ...
    return localizedMessage;
    }
    }